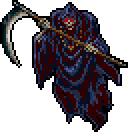
 Grim Reaper
| . |
Castlevania
& Vampire Killer
|
. |
Death is, without a doubt, always the
most annoying boss in each game it appears, and it's been in more games than
any other boss. In these two games, it'll pop down from the room's rightmost
ceiling and start rebounding around the room from left to right with its scythe
in hand--in sort of in a 'V' pattern. It'll also make three sickles start
appearing at random locations, all of which will fly directly toward you.
The moment one is destroyed, another will be spawned to take its place. Part
of defeating the Reaper is fighting through this flurry in order to get in
a clean shot. Bring your holy water or boomerangs, lest you'll be dead quickly.
| . |
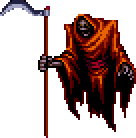
Castlevania
II:
Simon's Quest
|
. |
Sadly, Death seems to be rather unmotivated
this time around. Due to general laziness, it's instead like most enemies
in Castlevania II: Simon's Quest--that is, its job is to slowly levitate
down to your level and stalk you slowly. Its multiple-sickle attack takes
a break between games; instead, it throws out singular sickles, mostly downward,
in your direction at timed intervals. If you wait for Death to get to the
bottom of the room, you can wail on it, killing it easily. However, if you're
not quick, Death will crowd you into a corner and overwhelm you.
| . |
Castlevania
III:
Dracula's Curse
|
. |
The Reaper is back in full force for
this, one of his early encounters with the Belmonts. That said, Death'll attack
similarly to how he does in Castlevania: It'll move slowly around the
room--this time in a less predictable manner--and make Belmont-seeking sickles
appear in threes. The objective, as it was in the early games, is to avoid
the sickles and concentrate on Death without walking into it. If you manage
to defeat it, it'll rise again in a new form.
 |
|
|
 |
After taking an initial beating, the
Reaper will fade into darkness, as will the front and foreground. It'll reappear
in this form--a giant skull head. It'll move from right-to-left while looping
around in a circular motion; this method allows it to trap you in the room's
corners, since there isn't much time to pass underneath it. As an attack,
at timed intervals, it'll spit out singular sickles in your general direction;
this time, a simply dodging them will do. Beware, though, since its leaving
the screen means that it'll pop up on the other side of the room.
In this super installment, Death is
one of three final bosses guarding the way to Dracula. Its attack pattern
has advanced: It'll start by hovering across the top of the screen while throwing
singular sickles, speedily, in your direction. When it freezes in the air,
it'll swoop downward with its long scythe outstretched. Its final strategy
is to park itself in the corner, throw the scythe looping across the room
like a slow-moving boomerang, and use a spell to pull you forward (to your
Death?). While resisting the spell, you must find a way to dodge the scythe
on its return.
It's a tad different this time around:
Before the battle begins, six playing cards revolve around Death's frame.
You must strike all the cards, completing the challenge that each offers before
you get to fight the Reaper itself. They challenges include boss battles with
the Gear Steamer, Golem and Gargoyle Bat; two exploding scythe attacks; and
an energy replenishment, which is more about the timing of when you pick it
up. As for the Reaper: Its attack pattern is almost identical to that of its
appearance in Super Castlevania IV: It throws quick-moving sickles
downward in your general direction, and it uses its long, swooping scythe
dive; it can also conjure three sickles to dart toward you one after the other.
Finally, it'll use the spell to pull you forward while its boomerang-like
scythe circles the room.
As a boss of a remake, it attacks most
similarly to how it does in the first Castlevania: It'll fly to fixed
directions in a swooping motion whilst the three appearing sickles do most
of the work. Death'll writhe backwards when hit, giving you a much needed
advantage against its overwhelming nature--you can regroup and prepare for
its next attack. The Reaper is most dangerous when it flies to the center
of the screen, where it'll start to twirl its scythe around wildly, causing
a portal to open that will pull you inward; you'll have to resist being sucked
in while he begins throwing small skulls toward you; plus the sickles will
still be appearing.
In Dracula X: Rondo of Blood,
Death shows up on "Stage 0" for a test battle and then becomes the
boss of the ghost ship, while in Castlevania: Dracula X, it's an alternate
boss atop the clock tower In either case, its the same battle: Death'll hover
around overhead--this time as sort of a figure-8 pattern. Sickles will start
appearing randomly to stalk you, in large bunches, while Death hovers. Your
only advantage during this chaos is that Death will temporarily retreat each
time you strike it; as always, it's better to take the hit from the sickles
rather than Death itself.
|
|
|
|
When it's taken enough damage in its
first form, it'll shed its outer cloak and take to the area's background,
where it'll initially try to blast you with huge green-glowing skull heads
by throwing them one after another; this continues until you dodge them all.
When that happens, it'll whip out the scythe and return to the foreground--it's
mostly ground combat now as the appearing-sickle onslaught continues. Death
will attempt to lure you in to unleash a quick scythe-stab forward; after
two tries, it'll fly straight upward, roll into a ball, and then dart toward
you at a 45-degree angle. If you use a mystic weapon during its ground assault,
it'll defend itself with a circular red shield; the mystic weapon will break
into four pieces of debris and rebound back toward you. You'll have to stick
to the whip. The Castlevania: Dracula X version forgoes the glowing-skull
background attack and takes right to battle; its attack-pattern is altogether
similar except for one addition: Death will release, intermittently, a Richter-seeking,
circular-moving spark that hovers around the area for a short period.
| . |
Castlevania:
Symphony of the Night
|
. |
Death appears early in the game in
the form to the left to question Alucard's intentions. After learning of Alucard's
insistence on tampering with evils' plans, it'll flee--but not before ridding
Alucard of all his weapons and armor. Later on, you'll have the more important
meeting deep into the inverted castle. At this point, it's the standard Reaper
fair--it'll fly hover overhead while the randomly appearing sickles do most
of the work. It can also execute three other attacks: (1) It can send out
two energy balls to follow you around. (2) It can make two scythe-like blades
swoop toward you. (3) It can rapidly blast you with those Rondo-like
glowing skull heads. Like Dracula's teleport-and-attack routine, this has
become just a warm-up for Death's second forms.
|
|
|
|
Though it looks as if this would be
more of an offensive-minded form than a regular incarnation of Death, it only
has 2 attacks. As it hovers it across the room, it'll use its scythe-like
arms for two purposes: (1) It'll throw both of them either straightforward
or looping--as boomerangs in either case--before they return and reattach
themselves. Or (2) it'll dash into your general direction and viciously swipe
forward with both arms.
Death was probably unsure of what to
make of the Belmonts at this point in time, however inexperienced against
the family, so its assault is limited--all it seems to do is jump back and
forth, from one side of the room to the other. It does, however, command those
annoying sickles to twirl through the air and stalk the hero, in less of a
flurry than you'd normally expect. Still, though, the mantra holds true: It's
better to take the hit from the sickles than to make contact with Death itself.
The reaper will constantly continue
a barrage of sickles. This time, though, it can utilize a more effective power
to make them form into a circle and dart at you one by one. You'll spend much
of the battle running in circles trying to dodge them and chasing down Death
itself. Every so often, it'll gather itself at the battlefield's limits and
charge forward; when it tracks you down during that attempt, it'll swing the
scythe viciously. If you avoid battle by keeping your distance, it'll use
the scythe to summon large beasts--which look like three-eyed barracudas--from
the Dracula symbols that will be appearing in the air and on the ground--this
one after another.
| . |
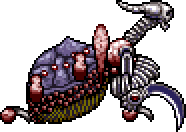
Castlevania:
Circle of the Moon
|
. |
The Reaper is a little more equipped
this time around. Within a long chamber, sickles will be appearing endlessly
while Death hovers toward the ceiling. Death will stop their progress at any
time to unleash one of two special attacks: (1) It'll extrude three spike-tipped,
tentacle-like steel rods--one downward, the others 45 degrees downward. If
you're close by, you'll be forced to rely on luck to find a safe spot between
them. (2) It'll unleash two large ectoplasmic spheres that'll travel in the
hero's direction. When it's had enough, it'll take its second form.
|
|
|
|
"Frustration" becomes the
name of Death's game. The onslaught of sickles will continue as this now-shelled
villain slowly crawls toward you. Its other two powers are used in conjunction
this time. As you fend off the sickles, the Reaper'll momentarily affect the
room's gravity so that you can't run fast or jump high; this is when you're
most likely to suffer multiple hits. Seconds later, after gravity returns
to normal, it'll use its weighty frame to pound the ground, shaking the room;
if you're on the ground during this time, you'll be damaged considerably.
The only way to hurt it is to get close enough to strike its arm joints, but
if you get too close, it'll slash you with his scythe-like claws.
| . |
Castlevania:
Harmony of Dissonance
|
. |
The Reaper's tried-and-true offense
is ever-present here. As per usual, Death will hover about and rely on the
conjured sickles to keep you busy. When Death sees an opening, it'll gear
up and lunge forward with its scythe; other times, it'll send the scythe spinning
forward like a boomerang; the weapon is most dangerous on its return. It shouldn't
be too tough to fight through the flurry and hit the real target. Death will
not allow you to overwhelm it with your whip attacks, however, as it'll randomly
vanish and appear elsewhere. As a final attack, it'll set up four parallel
slots for successive beams to quickly lower from the ceiling (similar to Dracula
attacks from Super Castlevania IV and Bloodlines).
|
|
|
|
Death's second form is very reminiscent
of the Bone Dragon King. Now half as large as the battle area, Death will
fly around in odd patterns and try to overwhelm you. However, you can only
be harmed by the scythes embedded onto its arms and tail. The objective is
to simply strike its skull--and to not get cornered and repeatedly damaged.
It will be a difficult task if you plan to stay grounded, so you may have
to use an advanced strategy: Climb on the middle of its bony back, where it's
safe, and get into a position where you can strike its skull again and again.
Don't stay on its back too long, though, or you may get trapped near the ceiling
and fall victim to its tail-sickle as it passes by.
| . |
Castlevania:
Aria of Sorrow
|
. |
Death goes back to residing in the
more conventional castle area--the clock tower. Once you enter its chamber,
it will begin making the usual endless array of hero-seeking sickles appear
from multiple locations at once; it will then separate from its scythe and
hover across the chamber while the weapon follows it, never straying too far
away. You'll immediately notice that you can't make contact with Death himself;
instead, you'll have to attack the scythe to cause damage. To make this more
difficult, as if the sickles aren't enough, he'll do one of two things: He'll
send the scythe twirling directly into your direction, or he'll make four
parallel beams shoot up from the ground where you stand, in succession; if
you don't stay in motion, you'll be trapped and damaged repeatedly.
|
|
|
|
When the scythe has taken enough abuse,
Death will pull out a new toy--a double edged scythe. Now Death will be able
to take damage, but you'll have to get close to inflict it; the range of the
scythe makes this tough. Death surely won't stay in place; he'll keep the
pressure on by executing three different attacks: (1) It'll lower to ground-level
and dash forward and then immediately back. The latter movement can catch
you off guard. (2) It'll make the scythe twirl into a ball and speedily circumnavigate
the room. (3) At mid-level, it'll throw the scythe twirling through the air
a short distance, like a boomerang, and then pull it back. The best time to
attack Death is when he releases the scythe during the latter two. Pay attention
to where it goes, though, since contact with the blades is crippling.
| . |
Castlevania:
Lament of Innocence
|
. |
 |
|
|
|
As Mathias' ally and chief servant,
Death is the final boss of this game. The Reaper will start things off by
wisping both you and he away to his own personal battlefield. Death will always
lurk around the edge of the battlefield, and he'll transport to different
locations if you remain too close. It's from here that Death can do four things:
He can back up and swipe his scythe forward once or twice. He can summon his
minions ("Minions!"), a pack of crackling skull heads that will
follow you around and explode on proximity. He can conjure souls ("Die!")
and harness them into a five-pronged homing attack. And he can twirl his scythe
overhead and fling it toward you. When his energy meter has been depleted,
he'll add in a fifth attack: The deadly tempest, a flame blast that strikes
the ground and spreads out in two successive expanding rings. Any two of these
attacks can be in effect at once. Additionally, if you try to attack Death
with a sub-weapon, he'll always deflect it back as a giant fireball. In
"Crazy Mode," there are some differences: (1) Its minions ignite
more quickly than normal. (2) During the conjured-soul, attack, it hits you
with a big black one before two-pronged white ones. (3) He uses the the deadly
tempest flame blast four-five times in a row. (4) He gains a new attack--an
atomic explosion ("It's over!") similar to Walter's; it takes about
a minute for Death to prepare it, and its sheer power cannot be guarded against.
| . |
Castlevania:
Dawn of Sorrow
|
. |
The bringer of death has some old and
new tricks alike. To start, Death is apt to either (a) swing its scythe twice
in succession, across and down, for a far-reaching attack, or (b) twirl the
scythe and toss it in the hero's general direction, where after a short time
it will break apart into a series of small sickles for a circular spreadshot.
When Death is separated from its scythe, it's prime time to go on the offense
while carefully avoiding contact while the Reaper as it hovers about. Finally,
it has available a spell that allows it to create the illusion of four lined-up
Deaths, which will each fire down a deadly beam for a sandwiching attacking.
|
|
|
|
When damaged sufficiently, Death will
change outfits and drag out some similar but more deadly offense. Death will
again employ a twirling scythe-throw, but, this time, the weapon will cycle
the immediate area and score multiple hits upon contact; concurrently, three
small sickles will appear and dart in the hero's directions. Otherwise, Death
will disappear and reappear for a surprise stabbing-hook attack, which it
can execute multiple times in a row if the attack isn't properly dodged. Most
dire is its summoning attack, wherein it throws off-screen four spirit essences
that return as giant skull heads, which enter from right to left respectively,
one after the other, for separate attacks that stretch a half-screen's length.
| . |
Castlevania:
Curse of Darkness
|
. |
|
|
|
|
It's the supporting cast member Zead,
thought an ally, who reveals himself to be the venerable Death. The battle
against Death, fought immediately after the defeat of Isaac, is quite similar
in feel to the one fought in Lament of Innocence: Death remains perched
in position, the camera at all times pointing forward, and the attacks executed
very much depend on your proximity. If Hector remains too far back, Death
will continue to toss his flaming scythe, which will stalk him for a short
period; if he gets closer, Death will conjure a set of sickles and toss them
one after another; get too close and Death will reel back and unleash a vicious
multiple-strike scythe-swipe. The other attacks are more random: (1) It'll
throw its hands into the air and cause pillars of flame to rise up--usually
from the position where Hector stands. (2) He'll toss onto the battlefield
a flaming sphere, which will soon result in a devastating explosion over a
very wide area, where it will linger for a while. And (3) Death will
render itself (and the battlefield) transparent and attack with its hand,
whose progress can barely be traced.
| . |
Castlevania:
Portrait of Ruin
|
. |
|
|
|
|
Dracula's confidant is well aware of
Brauner's intentions, but he must take things one at a time. You can expect
the basics: Death will conjure an endless storm of suddenly appearing sickles
and measure up heroes for ferocious swipes of the scythe, either sideways
or straight down when they pass beneath. Of note: Death is impervious to all
sub-weapons until weakened with repeated strikes, at which point he'll turn
white and thus more vulnerable He'll combine these attributes with some new
tricks: He can surround himself and the immediate area with a rotating four-sided
steel barrier (which moves relative to Death), within which he'll toss his
twirling scythe and watch it rebound (the heroes can safely travel outside
the barrier). He can also open four portals in the corners of the unseen barrier,
at which point chain-links with hands will reach out for eight grab attempts;
if any one is successful, the four will smother the target, and Death will
strike those captive with a crippling scythe shot. When failure seems like
its destiny, Death will flee to regroup.
|
|
|
|
In a first for the series, Death and
Dracula will combine their might and fight as a team, in keeping with the
partner theme of Portrait of Ruin. While Dracula attacks in his usual
method (as covered here), good ol' Death
fills the gap to keep things unpredictable. Basically, Death will dive down,
its scythe extended, any time you pass beneath it, which serves well to distract
you from Dracula's fireballs and pulsating orbs; Death will otherwise attempt
to keep you grounded by swiping the scythe sideways when you jump too close.
Dracula and Death can combine their powers for three team attacks: Death will
help engineer Dracula's bat-company dash; the two will unleash a scythe wave
plus pulsating-orb storm combo; or Dracula will use the dark energy of Death's
scythe to engulf the area in an atomic explosion. When the duo's energy has
been exhausted, Death will sacrifice its soul to fuel Dracula's transformation
into True Dracula so that the battle might continue.
| . |
Ecclesia
& Harmony of Despair
|
. |
|
|
|
|
Dracula's confidant knows about the
dark secrets much like series veterans know what to expect from the foe that
has become an obligatory presence preceding final showdowns with the Count.
This is not to suggest that Death (or his character designer) has become lazy--he's
surely got some new tricks up the sleeves of his tattered death garb. As the
infamous sickles spawn in at random locations and at an endless rate, Death
will look to capitalize on the hero's defensive posture by unleashing from
above a vertical scythe-chop or by charging horizontally, its scythe grinding
against the floor, and finishing with a vicious swipe. The sickle onslaught
will cease temporarily when it executes one of three devastating spells: An
absolute storm of sickles released in the hero's direction; two sets
of blades that form a half-circle before enclosing, potentially trapping and
repeatedly damaging the hero; or dark energy in the form of three large projectiles
that begin to outwardly spiral, covering a large radius.
Death, as it did in Rondo of Blood
and Symphony of the Night, appears early in the quest to test and intimidate
the hero. His scythe in hand, Death attempts to swoop in from the backdrop
with quick slices, which can be thwarted with some quick-swinging action.
After a few rounds, Death will hang back a bit and use its magic to summon
some zombies, which will aim to distract the hero while Death sneaks in to
attacs from the side. No longer able to hold off the hero's attack, he'll
retreat toward the castle's entrance--his last-ditch assault a boomerang-style
toss of the scythe. Having tested the hero's mettle, he descends into a dark
portal, laughing at the foolhardy adventurer.
|
|
|
|
When the hero reaches the top of the
Clock Tower, Death will reappear, no longer in the mood for games; its pre-fight
ritual, whose result is Death's transformation into a literal fiery angel
of death, is all the warning needed. In his new form, Death will immediately
charge hands-first toward the hero, expertly swinging and spinning its scythe,
which can lead to a series of strikes--each a devastating combo capable of
finishing off the hero in short order. Too, Death will put your blocking skills
to the test, preferring to stay up-close for similar combo attacks. Using
its teleporting ability, Death will sometimes attempt to suddenly appear behind
the hero and strike with a mighty, hammering blow. Taking to the air, Death
will circle the hero in a flurry and begin firing sets of exploding sickles
in succession. When its life-force is low, Death will bring back its boomerang-scythe
toss and use it as distraction for his normal charge attack.
| . |
Castlevania:
The Adventure Rebirth
|
. |
 |
|
|
|
Summoning the souls on which it finds
sustenance, Death takes form with murderous ambition. Death starts the festivities
by conjuring large sickles, which rather than appearing from random locations
are this time emitted from his bony hands; the barrage is tangible, the stream
short and number of sickles limited to eight. Should Death exit the battlefield,
it's a sure sign that a giant scythe is about jut in from off-screen in an
attempt to hook and snare Christopher Gong Show-style. Death can also
split into two, both it and its projected double positioning themselves on
either side of the screen and releasing from their seals/portals an endless
stream of sickles; the attack can be cut short if both reapers are assailed.
Additionally, Death can conjure three huge scythes, which after appearing
will circle their master as he hovers about the area intent on making direct
contact. His other attacks include a swooping dive; the release of five flaming,
stalking skull heads; and a laser fired via a quick swipe of the scythe.
Back