| . |
Castlevania:
Dracula X
|
. |
Dracula is the same Dark Lord you've come to know
and love, but this battle is a bit different: You'll be holding court
on the very tip-tops of pillars--some high, others lower--sandwiched between
each considerable gaps. Dracula will surely take advantage of this obvious
danger. At your arrival, he'll begin teleporting about from pillar to pillar,
stopping to release three-directional fireballs. Though, like his Rondo
skin, he'll mix things up and at other times unleash two large pulsating
orbs--the first high, the second low--that rev up and blast in your direction.
If you can find a good comfort zone, preferably on the low pillars, you
can from there memorize his tendencies and strike when ready. But be careful--one
wrong move and it's all over.
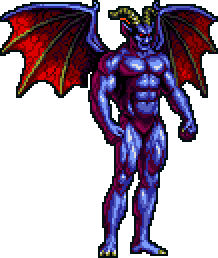
It looks like a different animal, but this second
form very much mimics Dracula's second form from Rondo. It will showcase
its high-jumping ability by lunging toward the hero, from pillar to pillar.
There's not much you can do prevent being cornered, considering the lack
of--oh, I don't know--a floor, so you should avoid finishing off
Drac's first form if it's positioned on a center pillar. After each pillar-hop,
the demon will spit in your direction two huge balls of flame; after every
third jump, it'll unleash across the way a wide devastating scroll-blast,
which you can dodge easily by crouching on a low pillar. If you have long-range
sub-weapons, use them; if not, you'll have no choice but to take the fight
to the highest pillars, retreating when necessary.